How to Set Up an HTTP Proxy in Multilogin Using OkayVPN HTTP Proxy
Multilogin is a powerful tool for managing multiple browser profiles with unique fingerprints and IP addresses. To enhance your privacy and security, you can integrate an HTTP proxy, such as one provided by OkayVPN. This tutorial will guide you through the simple steps to set up an OkayVPN HTTP proxy in Multilogin.
Prerequisites
Before starting, ensure you have:
A Multilogin account and the app installed.
An OkayVPN HTTP proxy subscription with the following details:
Proxy IP address (e.g., 123.45.67.89)
Port number (e.g., 8080)
Username (e.g., your_username) your okayvpn email
Password (e.g., your_password) your okayvpn password

These details are typically provided by OkayVPN in your account dashboard or via email after subscribing.
Step-by-Step Tutorial
Open Multilogin
Launch the Multilogin app on your device.
Create a New Browser Profile
On the left sidebar, click "Create new" under the "Browser profile" section.
A new window will appear to configure your profile.
Name Your Profile
Enter a name for your browser profile (e.g., "OkayVPN Profile") in the provided field.
Edit Proxy Settings
In the same window, locate the "Proxy" section and click "Edit proxy settings".
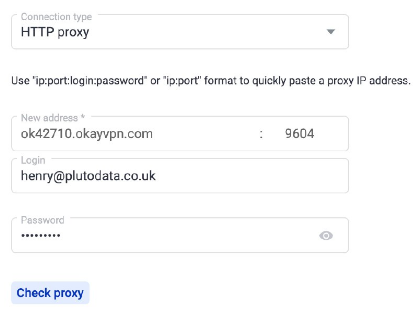
Configure the HTTP Proxy
Connection type: Select "HTTP proxy" from the dropdown menu.
IP: Enter the OkayVPN proxy IP address (e.g., 123.45.67.89).
Port: Enter the port number (e.g., 8080).
Login: Input your OkayVPN username (your okayvpn email ).
Password: Input your OkayVPN password (your okayvpn pass).
In the proxy settings window:
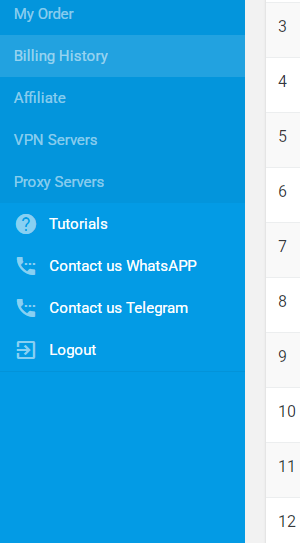
check port at okayvpn member center: proxy servers

Test the Proxy
Click the "Check proxy" button to verify the connection.
If successful, you’ll see a confirmation message with the external IP address matching your OkayVPN proxy.
Save and Create the Profile
Click "Create profile" to save your settings and finalize the setup.
Launch the Profile
Back on the main screen, find your new profile (e.g., "OkayVPN Profile") and click "Start" to launch it.
Open a browser within the profile and visit a site like https://whatismyipaddress.com to confirm the proxy IP is active.